Feeds:
Posts
Comments

Archive for the ‘Seafood’ Category

wine and cheese

For our wedding last year, we received a generous and creative surprise gift from my uncle and his family: a bottle of Dom Perignon. Folks, this tasty stuff was produced in 1999, when Craig and I were but high-schoolers. Needless to say, when we received it, we knew we’d save it for a special occaision to enjoy. Luckily, we knew we had many milestones coming up alongside our one-year anniversary – around that same time (May of this year), Craig would graduate from law school, and I would graduate with my Master’s. Well, May came and went in a whirlwind, and Craig immediately became focused on studying for the Virginia Bar. Instead, we made this celebratory meal in late July, when he finished the Bar exam and I (finally) finished off my Master’s thesis.

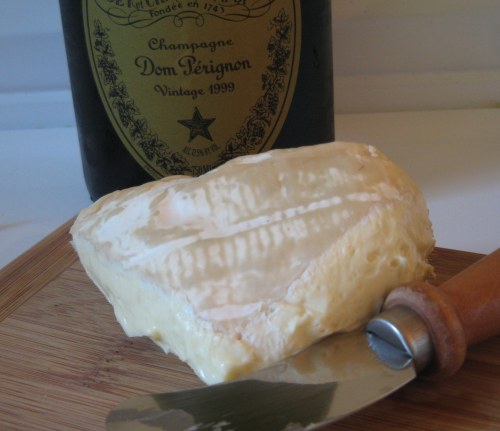
For this meal, I knew I wanted food that would allow the champagne to shine. For a first course, I decided on some simple cheese and crackers. I love cheese, and I especially love it with wine. I asked the nice cheese counter attendant at Whole Foods what cheese he recommended with champagne, and he suggested a Pierre Robert. I didn’t mention the specific champagne in question as I didn’t want to sound like a tool, but I ended up with a pairing that was not what I was hoping for.

Before I tell you why the pairing was not ideal, let me give you context by providing our review of Dom Perignon. This champagne is extremely dry. It has an earthy taste (almost mineral-y), and it is quite fizzy – fizzier than other champagnes we’ve had. It has a few fruity notes, but mostly it is dry. This makes it fun to pair with food, but makes for different pairings than those that would work with your everyday champagne. 

The reason it did not work particularly well with this cheese is that the funkier, earthy tastes in the cheese competed with the earthy, mineral-y taste in the champagne. This cheese needs a sweeter wine. I am not making this up – even Craig, who jokes that his ability to differentiate between wines is limited to “red” and “white,” agreed that this pairing was not ideal. It was no matter, though – we enjoyed a delicious glass of champagne, then ate the cheese separately.

Luckily, our entree made for an ideal pairing with the wine:
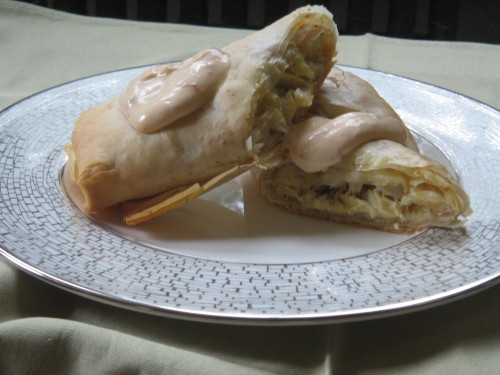
crab strudel

This is Ina Garten’s crab strudel, and it is delicious. I knew I wanted to pair the champagne with seafood, and there is something that is just so festive and special about crab. Plus, I like its texture a lot better than that of lobster. The strudel includes a touch of curry powder, which we loved, and it seemed to go especially well with the champagne. If you are a confirmed curry-hater, however, you can use Old Bay instead. I thought the strudel also needed a topping or sauce, so I made a spicy mayo by combining canola mayo with a touch of hot chili garlic paste, salt, and a little bit of water. This added a lot to the dish, in my opinion. Next time you want something to go with champagne, make this – it would be great on New Year’s. You can also slice it into small rounds for a party appetizer.

Crab Strudel

Lightly adapted from: Ina Garten, Food Network

ingredients (I made a half recipe, but this is the full recipe – halving it is more than enough for 2 entrees)

  • 12 tablespoons (1 1/2 sticks) unsalted butter, divided
  • 2 garlic cloves, minced
  • 1 teaspoon curry powder
  • 1 pound lump crabmeat, drained
  • 1 lime, juiced
  • Kosher salt
  • 1/2 teaspoon freshly ground black pepper
  • 10 sheets phyllo dough
  • 1/4 cup plain dry breadcrumbs

directions

1. Preheat the oven to 400 degrees. Heat 2 tablespoons butter in a medium saute pan, add the garlic and cook over medium-low heat until soft, approximately 2 minutes. Add the curry powder and stir. Remove from heat.

2. Shred the crabmeat into a bowl (leaving some larger pieces) and mix with the lime juice, salt, to taste, and pepper. Add the garlic mixture.

3. Melt 10 tablespoons of butter in a small pan. Unfold 1 sheet of the phyllo dough. Brush the sheet with melted butter and sprinkle with bread crumbs. Repeat the process by laying a second sheet of phyllo dough over the first sheet, brush it with melted butter and sprinkle with bread crumbs until 5 sheets have been used. Spoon a 1-inch wide row of the crab mixture along 1 edge of the phyllo dough. Roll it up. Brush the top with butter and set aside. Repeat the entire process using the all the phyllo dough and crab filling.

4. Cover a sheet pan with parchment paper (I used my Silpat). Score the crab strudel diagonally into 1 1/2-inch pieces and bake for 12 minutes, or until the top is lightly brown. Slice and serve.

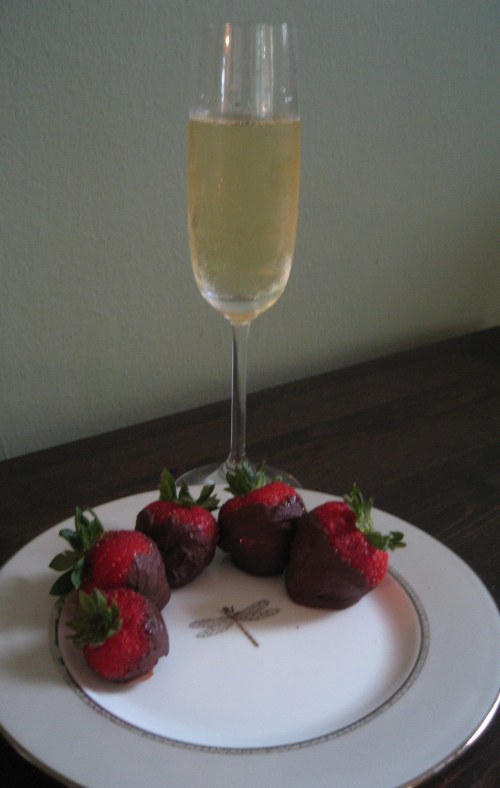
Finally, for dessert, I made chocolate-dipped strawberries. These are easy to make just by melting high-quality chocolate chips in a makeshift double boiler. I recommend adding a healthy splash of vanilla to the chocolate. Dip the berries and place them on wax paper or a Silpat, then transfer to the fridge to harden. Take them out about 30 minutes before you want to serve them.
dessert

The berries also paired wonderfully with the last of the champagne. The contrast between the sweet berries and the dry wine was a winner. We had a wonderful evening enjoying this wine and food and celebrating the end of the taxing grad-school chapter of our lives!
Read Full Post »

Mahi

When I was a freshman in high school, my family took a trip to Hawaii.  I’ve always loved to travel, and I could spend hours leading up to a trip reading Fodor’s and Frommer’s guides, picking out places I have to go and, of course, things I have to eat!  One of the food items that caught my attention at that time was the bento box.  I believe this is a concept the Hawaiians picked up from Japanese cuisine, as our local Japanese place makes them as well.  Basically, it’s a divided tray of various meats, salads, rice, etc. that are designed to compliment one another – a more fun version of a boxed lunch.

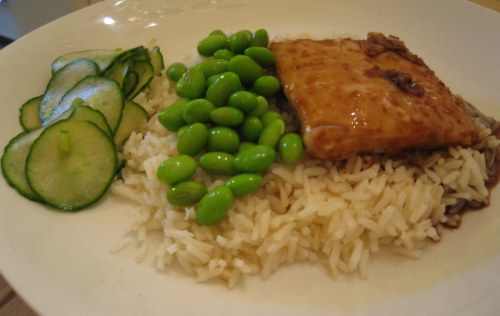
For some reason, bento boxes came back into my mind recently, and I decided to make one with some mahi mahi I’d picked up.  I ultimately decided I wanted to make quick Asian pickles, and after consulting a few quick pickle recipes, I came up with my own concoction.  The key was slicing them very, very thin on the mandoline.  I was extremely happy with how they came out, and I can’t wait to make a bigger batch once my garden cucumbers are ripe (they have huge flowers – it won’t be long now).  I was really bummed that I didn’t have any fun, divided plates to make this dish a true bento box, but otherwise, everything was very good.

Quick Asian Pickles

After consulting a few other pickle recipes, I came up with this one on my own

ingredients

  • Half of a large English cucumber or several small pickling cucumbers
  • Salt
  • Sugar
  • 1 ½ Tbsp. rice vinegar
  • Light green parts of 2 scallions, finely chopped
  • Dash of hot sauce
  • 1 tsp. soy sauce
  • 1/8 tsp. grated fresh ginger

directions

1. On a mandoline, slice the cucumber into very thin rounds.  Lay the rounds in a single layer in a strainer and sprinkle with a pinch of salt and a pinch of sugar.  Set aside for 15 minutes.

2.  Meanwhile, combine the vinegar, scallions, hot sauce, soy sauce, ginger, and another small pinch of sugar in a small bowl.

3.  Add the cucumbers to the rest of the ingredients and toss to combine.  Add additional salt to taste.  Let stand 10 minutes and serve.

For Bento Box:

ingredients

  • Homemade teriyaki sauce
  • One 1/2-pound mahi mahi filet
  • 1 cup shelled edamame
  • 1 cup Jasmine rice
  • Quick Asian Pickles

directions

1. Prepare rice according to package directions.  Meanwhile, preheat the broiler.  Spray a baking sheet with nonstick spray and place the fish on it.  Broil fish until just firm, about 7 minutes.

2. Thaw edamame under cold water.  Pat dry with a towel.  Sprinkle with kosher salt.

3. Plate the rice.  Cut the fish in half for 2 portions and gently dip each half in the warm teriyaki sauce to fully coat.  Add a serving of the edamame and a serving of the pickles, all atop the bed of rice.  Serve and enjoy!

Read Full Post »

shrimp tacos

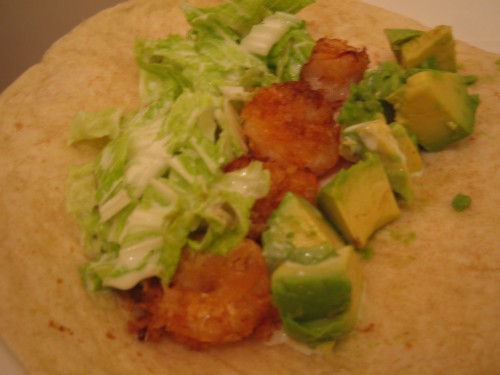
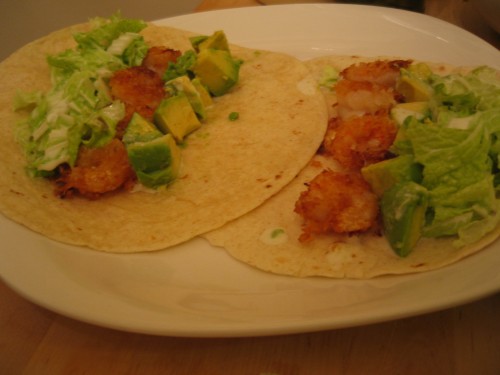
These tacos were so good, with a great balance of flavors. When we made our monthly trip to the awesome (though faraway) grocery store Wegman’s recently, I bought my standard 2 lb. bag of shrimp. Since I often have some on hand, I am always looking for new, good things to do with the shrimp. While browsing Food and Wine online, I saw a recipe for tacos that featured fried shrimp and a spicy slaw. I knew I wanted to make a version of them, but I made the recipe all my own based on what I had on hand and our own tastes (mainly, that is, the fact that we’re avocado lovers).

Avocado and crispy shrimp tacos with spicy slaw

Makes 4 tacos (2 servings)

ingredients

for shrimp:

16 shrimp – peeled, deveined, and tails removed, patted very dry

½ cup milk

2-3 Tbsp. plain yogurt

¾ cup panko

Canola oil for frying


for tacos:

1 large, ripe avocado

½ lime

Salt

4 small flour tortillas


for slaw:

1 ½ cups shredded Napa cabbage

¼ cup canola mayonnaise

6 pickled jalapeno slices

1 Tbsp. juice from jar of pickled jalapenos

Up to 1 Tbsp. water as needed

Salt and pepper


directions


1. First, prepare slaw. Finely mince pickled jalapenos until they are almost completely crushed. Place in a medium mixing bowl with the mayo and add the juice from the jalapeno jar and salt and pepper to taste. Whisk together, adding water if needed to make a dressing with a vinaigrette-like consistency. Fold in shredded cabbage and toss to coat cabbage with dressing. Set aside.


2. Next, bread shrimp. Whisk together milk and yogurt in a shallow bowl, adding more yogurt if necessary to make the milk the consistency of buttermilk (so that it just coats shrimp) – the original recipe called for buttermilk, so you can use that if you have some on hand. I made this substitution because the only buttermilk left at the store was in quart-sized containers; that’s definitely not an amount I could use up!


Place the panko in a second shallow bowl. Dip the shrimp first into the milk mixture and then into the panko, pressing to coat shrimp in the crumbs. Set breaded shrimp aside on a clean plate.

3. Roughly dice avocado and toss with juice of ½ lime and a sprinkling of salt on the cutting board.


4. Fry shrimp. Heat about ½ inch of canola oil in a cast iron skillet or another heavy pan over medium-high heat. Oil is ready when a small pinch of flour sizzles and immediately dissipates when added. Fry shrimp for a total of 2 minutes, turning once. Drain shrimp on paper towels.


5. Warm tortillas by wrapping them in a clean kitchen towel and heating in the microwave for 20-30 seconds on high. Plate tacos by dividing shrimp and avocado among the tortillas and topping each with slaw and a drizzle of additional dressing.


Enjoy!

one taco

For the Food and Wine recipe that inspired me to create this dish, click here.

Read Full Post »

Golden Tilapia

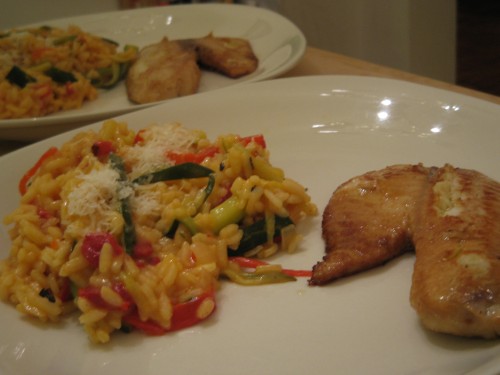
When I was making my grocery list for the week, it occured to me that my husband Craig would be taking the MPRE, aka the ethics portion of the Bar, on Saturday (which also happens to be his birthday, but more on that later in the weekend). As such, I figured I should ask him what he wanted to eat on Friday night that would give an extra boost to his mental agility. Unfortunately, my mental agility was apparently in the toilet, because I asked him once, got an answer (fish), and then proceeded to forget that he had given me an answer and ask him again. Of course, I got a different answer the second time I asked (risotto). I realized this while I was grocery shopping, and decided I would make both – tilapia filets with a nice veggie risotto on the side.

This tilapia recipe has a special place in my recipe book because it was the first moderate-difficulty recipe I attempted when I was first learning to cook. I simplified it slightly for this meal, but I also recommend the original, which is linked below.

I also can’t believe I haven’t blogged a risotto yet. I learned how to make risotto from my dad (we’ve since dubbed him the “Risotto King”), who in turn learned from an Italian chef in Ann Arbor, MI. I really enjoy making risottos and, even more so, eating them. However, I usually make them as a main dish, so it was a slight departure for me to serve it as a side here.

Golden Tilapia

Adapted from: Food Network

ingredients

Coarsely ground pepper

1 tsp. sugar

3 Tbsp. soy sauce

2 ½ Tbsp. rum

¼ tsp. lemon zest

1 ½ Tbsp. lemon juice

½ tsp. ground ginger

1 tsp. garlic powder

2 tilapia filets

Olive oil to cook


directions

1. In a small saucepan over medium high heat, bring soy sauce, rum, lemon juice, lemon zest to a simmer. Add sugar and whisk to dissolve. Whisk in pepper, ground ginger, and garlic and reduce slightly – for about 3 minutes. Remove from heat and let cool.


2. Pour marinade over filets and marinate 20-30 minutes (if making the risotto, you can just marinate for the time it takes to cook the risotto).


3. Coat the bottom of a sauté pan well with olive oil and heat over medium high until shimmering. Remove filets from marinade and let excess drain off. Cook 2-3 minutes on each side, until fully opaque.


Zucchini-Red Pepper Risotto

ingredients

4 cups chicken broth

3 Tbsp. unsalted butter

½ onion, diced

1 ⅓ cups Arborio rice

2/3 cup dry white wine or dry vermouth

1 small zucchini, julienned

6 oz. jarred fire-roasted red peppers

2/3 cup freshly grated parmesan (go for the good stuff in this recipe)


directions

1. Put chicken broth in a saucepan, cover, and bring to a rapid simmer over medium high heat.

2. Melt 2 Tbsp. butter over medium high heat in the largest high-sided sauté pan you have, or in a Dutch oven.  When beginning to foam, add onion and cook 3-4 minutes, until softened but not brown.

3. Add rice and toast, stirring constantly, for about 2 minutes.

4. Add the wine and cook, stirring constantly, until wine is almost fully absorbed.

5. Add two ladle-fuls of hot broth, just enough to cover the rice. Cook, stirring frequently, until broth is nearly absorbed. Continue to add broth in small batches and to cook, stirring frequently (I find that two ladles at a time works well until the end, when I cut down to one at a time).

6. When about half the broth has been added and the rice is about half cooked, add zucchini and peppers. It may be necessary to raise the heat slightly for a few minutes after adding vegetables to return the contents of the pan to temperature.

7. Taste grains of rice frequently to monitor for al dente doneness, and add smaller additional batches of broth as necessary. When the rice reaches al dente (this could take anywhere from 15 to over 20 minutes depending on the batch), turn off the heat.

8. Add most of the parmesan (reserving a small amount to sprinkle on top) and the remaining 1 Tbsp. butter, and stir vigorously. Once the texture is creamy and butter and cheese are melted,* plate and sprinkle with reserved parmesan to serve.


*If making with tilapia, the risotto can be covered and set aside in its pan for the few minutes it takes to cook the fish. The time it takes to prepare the fish will also be reduced by immediately putting a pan on the hot risotto burner to cook the fish.


Read Full Post »

I’m back! After a long month of a new job, weekend travel, and, as always, grad school work, I have reemerged to finally share this shrimp recipe with you. This was a dish I’d been wanting to make for awhile. Frying is always a little intimidating, especially when it comes to seafood, and I wasn’t sure whether to deep fry these, pan fry them, or broil. I just knew I wanted them to be super crispy with the panko. I finally settled on shallow frying them in our cast iron pan. I had watched a new show called The Cooking Loft, on which she made fried chicken and demonstrated how the flour should sizzle and then immediately dissolve when the oil is at temperature, so that eliminated the need to go out and buy a frying thermometer. I put in enough oil to go a little more than halfway up the shrimp and turned them once. This worked out very well and I will definitely use this method for frying shrimp in the future. The homemade sweet and sour sauce was absolutely delicious. I will definitely be making these shrimp as an appetizer the next time I have someone over.

Panko Shrimp with Sweet and Sour Sauce

Adapted from: Ming Tsai, Food Network

ingredients

1 minced shallot

½ Tbsp. minced ginger

1 tsp. Asian chili garlic sauce, or to taste

½ cup fresh orange juice

½ lemon, juiced

1 lime, juiced

½ Tbsp. sugar

½ Tbsp. soy sauce

Canola oil to cook

Salt and black pepper, to taste

12 large shrimp, peeled and deveined

1 cup all-purpose flour, in a shallow dish

2 eggs, beaten, in a shallow dish

1 cup panko, in a shallow dish


directions

  1. In a saucepan coated lightly with oil on medium heat, saute shallots and ginger until soft, about 3 minutes.  Deglaze with juices, chili sauce, sugar, and soy sauce.  Check for seasoning. Reduce by 50 percent until a syrup consistency is achieved. Set aside.
  2. Season the shrimp with salt and pepper. Dredge shrimp in flour, then egg, then panko.
  3. Heat oil until shimmering and a sprinkling of flour sizzles and immediately dissolves. Fry shrimp until golden brown, about 3 to 4 minutes total, turning once. Drain on paper towels. Serve sauce in a ramekin, surrounded by the shrimp.

Read Full Post »

My husband and I were fortunate enough to have my younger brother visit this weekend on his way back for his senior year of college at the Citadel. As you can see from the photo above, my “little brother” Dustin is no longer so little! Dustin has loved shrimp all his life, and I had just gotten some awesome-looking udon noodles from my favorite grocery store, Wegman’s, so I decided to make kung pao shrimp over udon for a home-cooked meal while he was here. I love the kung pao recipe that Bridget at The Way the Cookie Crumbles adapted from Cook’s Illustrated, and this is my version – pretty much true to the recipe she has, but with just a few small changes.

Kung Pao Shrimp over Udon

Adapted from: Bridget’s blog

ingredients

21 extra-large shrimp (21 to 25 count), peeled and deveined
1 tablespoon mirin
2 teaspoons plus ½ tablespoon soy sauce
3 medium cloves garlic, minced
2 teaspoons grated ginger
3 tablespoons peanut oil or canola oil
½ cup roasted unsalted peanuts
1 to 1 ½ teaspoon dried red pepper flakes
¾ cup low-sodium chicken broth
2 teaspoons rice vinegar
2 teaspoons toasted sesame oil
½  tablespoon fish sauce
1 tablespoon hoisin sauce
1½ teaspoons cornstarch
1 medium red or orange bell pepper, cut into 1 inch strips
3 medium scallions, sliced thin

3-6 oz. packets udon noodles


directions

1. Toss shrimp with mirin and 2 teaspoons soy sauce in medium bowl; marinate until shrimp have absorbed flavors, about 10 minutes. Mix garlic, ginger, and 1 tablespoon oil in small bowl; set aside. Combine peanuts and chile flakes in small bowl; set aside. Mix chicken broth, vinegar, sesame oil, ½ tablespoon soy sauce, fish sauce, hoisin sauce, and cornstarch in small bowl or measuring cup; set aside.

2. Meanwhile, bring a saucepan of water to a boil. When water boils, turn off the burner and add udon noodles. Gently separate noodles with a fork and let stand in water for 2-3 minutes. Drain and set aside.

3. Heat 1 tablespoon oil in 12-inch skillet over high heat until just beginning to smoke. Add shrimp and cook, stirring about once every 10 seconds, until barely opaque, 30 to 40 seconds; add peanuts and chiles, stir into shrimp, and continue cooking until shrimp are almost completely opaque and peanuts have darkened slightly, 30 to 40 seconds longer. Transfer shrimp, peanuts, and chiles to bowl; set aside.

4. Return skillet to burner and reheat briefly, 15 to 30 seconds. Add remaining 1 tablespoon oil, swirl to coat pan, and add red bell pepper; cook, stirring occasionally, until slightly softened, about 2 minutes. Clear center of pan, add garlic-ginger mixture, mash into pan with spoon or spatula, and cook until fragrant, 10 to 15 seconds; stir into peppers until combined.

5. Stir broth mixture to recombine, then add to skillet and cook, stirring and scraping up browned bits on bottom of pan, until sauce has thickened slightly, about 45 seconds. Stir in scallions and udon noodles and toss. Add shrimp and peanut mixture and toss to coat with sauce and warm through, about 1 minute; transfer to shallow bowls with 7 shrimp each and serve immediately.

Serves 3.

Thanks to my husband, Craig, for snapping the photos for this entry!

Read Full Post »

I love beans and rice. A lot. Hearing how great dried beans come out from a Crock Pot, I decided to make some red beans from scratch to serve over rice. I was hoping to emulate some yummy red beans and rice I had last week from Rocklands Barbeque here in DC. I had a lot of shrimp in the freezer and some leftover Cajun seasoning I’d mixed up, so I decided that would be a good accompaniment.

The finished product

Red Beans and Rice (adapted from crock-pot.com)

Ingredients:
1 lb dry red beans (Yes, this makes a lot, but the leftovers are great)
1 medium onion, chopped
1 red bell pepper, chopped
3 cloves garlic, minced
2 cans beef or chicken broth (I used 1/2 beef and 1/2 chicken because it was what I had)
2 cups water (I would reduce this to 1 or 1 and a half cups next time – I thought it was a little too soupy at the end, though the leftovers were perfect)
1/2 lb smoked ham, diced
salt and pepper
1 tsp hot sauce (I used Cholula)
(I also had a lone zucchini that needed to be eaten, so I diced that up and put it in as well)

cooked white rice

Directions:
Sort and rinse beans, and pre-soak according to package directions. Meanwhile, dice all of the vegetables and the ham. Combine all ingredients except rice in Crock Pot. Cover cook on Low 10 to 12 hours or on High for 5 to 6 hours (I did the latter, and it took 5 hours). Serve over hot rice.

Cajun-Spiced Shrimp
Ingredients:
As many shrimp as you like (I made us 7 apiece), peeled and deveined, with or without tails
Cajun seasoning, which consists of 2 parts Cayenne, 6 parts paprika, 1 part garlic powder, and plenty of salt and pepper
Butter
Olive oil

Directions:
Rinse shrimp and pat dry with paper towel. Sprinkle lightly with Cajun seasoning. Heat equal amounts butter and olive oil over medium-high heat in a sauté pan to coat the bottom evenly (I needed about 1/2 Tbsp. of each). Once pan is hot and butter is bubbly, sauté shrimp 1-2 minutes on each side – until fully opaque. Serve over red beans and rice.


Read Full Post »