Feeds:
Posts
Comments

Archive for January, 2009

My first award!

Mary Ellen at MaryEllen’s Cooking Creations (which is, by the way, one of my favorite cooking blogs and the source of many of my starred recipes in Google Reader) has awarded me my first blog award!  It’s the Lemonade Award, which is for having a refreshing blog, just like lemonade. Thanks, Mary Ellen!

This award is meant to be shared and passed on, so there are a few rules –

– Add the logo to your blog
– Add a link to the person who gave you the award
– Nominate up to 10 other refreshing blogs and list the links. Then, leave a message for each nominee informing them of the award.

It’s a lot of fun to be able to give this award out to some of my favorite blogs.  Here are my winners:

A Year in the Kitchen – My favorite part of this blog is her “Country Challenges,” which I’ve mentioned here before.  She checks out authentic cookbooks from the library and makes several dishes from each country she chooses.  In an age when cooking and, especially food blogging, has become entirely web-driven, I find it refreshing that she goes to the library to research each country! All of the dishes always look great, too.

Delish – I like the photography in this blog, as well as the wide variety of recipes found there – everything from muffins to enchiladas to Chinese dishes!

Elizabeth’s Edible Experience – One of my all-time favorite blogs.  Almost everything she makes appeals to me, and her writing is excellent – funny and engaging.  Plus, this blog is the first place I turn if I’m looking for a New Orleans-inspired dish, as she’s a New Orleans native.

Food Alla Puttanesca – I like this blog’s emphasis on easy weeknight meals that pack tons of flavor.  Like me, KMAYS likes to experiment with lots of different spices and ethnic flavors.  Her Ma Po Tofu is on my list to make soon – it looks just like the version I had in China.

Fresh from Cate’s Kitchen – This blogger recently moved to Thailand, and I am having a great time following her adventures, food-related and non-food.  Plus, I still turn to her posts from before she left for interesting and inspired dishes, many of which feature authentic Asian ingredients.  I still can’t wait to try her Japchae.

Oishii – Sort of the opposite scenario of the blog directly above, this blogger lived in Japan for quite awhile before moving back to the U.S.  Her posts from her time in Japan are very interesting, and the recipes she posts now are full of fresh ingredients and classic techniques – a reflection of her home state of California.

One Bite at a Time – A newer blog, but one that’s off to an impressive start.  A collection of tasty, mostly from-scratch recipes and good photography.  I can’t wait to see what she’s making next.

If you noticed a bit of a theme in the blogs I chose, you’re right: I really enjoy food that transports you to another place.  In honor of that, I am rolling out a series of posts over the next couple of months on classic Italian dishes.  The first one is coming very soon, so stay tuned!
Read Full Post »

fettuccine bolognese

I recently saw a recipe for Anne Burrell’s bolognese over on Kaitlyn’s blog. If you don’t know who Anne Burrell is, she is perhaps best known as Mario Batali’s soux chef on Iron Chef America. She was also recently given her own FN show called Secrets of a Restaurant Chef, and while some find her quirky personality a bit off-putting, the recipes get great reviews. I had been meaning to try making a traditional bolognese, so when I saw this version that took 4 hours in Kaitlyn’s blog, I figured it must be the real deal.

However, my bolognese definitely ended up having my own twist. When I was shopping for the meat for the sauce, they were all out of the naturally raised beef I prefer to buy. In fact, the ground beef in general was pretty picked over. That’s when a new item caught my eye – ground, naturally raised bison. I have had bison burgers before, but never attempted to cook it at home. I figured this would be the perfect way to try it – after all, I am pretty sure bolognese in Italy started as a foolproof way to use up cuts of game. For the sauce, since I was making a half recipe, I rounded out my pound of healthy, affordable ($4.99/pound) bison with a half-pound of ground beef chuck that Craig picked up on a calmer grocery day when there was more selection.

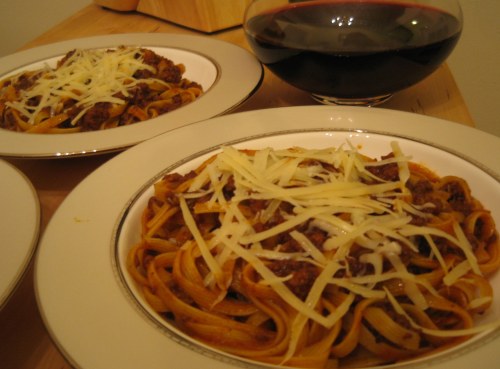
This sauce was to-die-for. It definitely made a dish worthy of Anne’s “restaurant chef” title. And, almost as good, it made our home smell like an Italian trattoria. The original recipe would make a ton, so only make the full recipe if you plan to freeze some sauce. The half recipe mixed well with a pound of pasta, making about 5 servings.

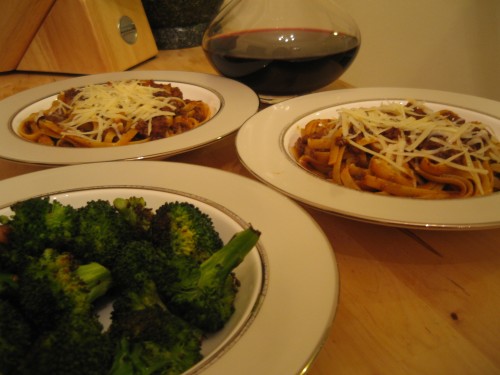
I served this with garlic roasted broccoli (instructions below) and a glass of Chianti!

bolognese meal

4-Hour, 2-Meat Authentic Bolognese

Adapted from: Anne Burrell, via Kaitlyn’s blog (see link above)

ingredients

½ large sweet onion, roughly chopped

1 large carrot, cut into 1-inch pieces

2 ribs celery, cut into 1-inch pieces

2 cloves garlic

Extra-virgin olive oil, for the pan and for finishing

Salt (I used my sea salt grinder)

1.5 pounds ground meat of your choice – I used 1 lb. of bison and ½ lb. ground chuck

1 cup tomato paste

1 ¼ cups hearty red wine – I used Chianti – this is Italian, after all!

Water

1 bunch thyme, tied in a bundle

1 pound fettuccine

Coarsely grated or shaved Parmigiano-Reggiano


directions

1. In a food processor, puree onion, carrots, celery, and garlic into a paste. In a dutch oven over medium heat, coat pan with oil. Add the pureed veggies and season generously with salt. Raise the heat to medium-high and cook until all the water has evaporated and vegetables become nice and brown, stirring frequently, about 10 to 15 minutes. Be patient.

2. Add the ground meat and season again generously with salt. Brown the meat to a deep, rich brown. Don’t worry if there is a lot of brown stuck to the bottom of the pan. This should take 15 to 20 minutes.

3. Add the tomato paste and cook 4 to 5 minutes. Add the wine. Cook another 4 to 5 minutes.

4. Add about 2 cups of water to the pan, or enough to raise the level of liquid by at least 1 inch. Stir to combine. Bring to a boil and reduce to a simmer, stirring occasionally. Add the bundle of thyme. As the water evaporates, gradually add more, 1 to 2 cups at a time. Don’t be shy about adding water during the cooking process; you can always cook it out. I checked the sauce every 20-30 minutes and probably added about 3 additional cups of water in addition to the first 2 cups. Stir and taste frequently. Season with salt as sauce cooks – this sauce will probably need more salt than you’re used to putting in things since it’s almost all meat. Simmer for 3 ½ hours.

5. During the last 30 minutes of cooking, bring a large pot of water to a boil over high heat to cook the pasta. Salt water well before adding pasta. When the water is at a rolling boil add the fettuccine and cook for 1 minute less than it calls for on the package (for Barilla fettuccine rigate, 7 min.). Reserve ½ cup of the pasta cooking water.

6. While the pasta is cooking, remove ½ of the sauce from the pot and reserve. Drain the pasta and add to the pot with the remaining ragu. Stir or toss the pasta to coat with the sauce. Add the reserved sauce gradually to make it about an even ratio between pasta and sauce. Add the reserved pasta cooking water as needed and cook the pasta and sauce together over medium-low heat for about 2 minutes. Turn off the heat and give pasta a drizzle of the olive oil. Toss vigorously. Divide the pasta and sauce into serving bowls. Top with grated Parmigiano. Serve immediately.

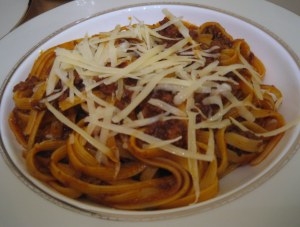
bolognese

For Garlic-Roasted Broccoli:

Adapted from: None – just looked up a rough cooking time online and then made this one up.

Preheat the oven to 425. Wash broccoli and cut into large florets. Pat broccoli dry. Slice a large garlic clove into very thin rounds. Drizzle a baking sheet with olive oil. Add broccoli to sheet and drizzle a little more olive oil on top. Sprinkle with salt and crushed red pepper flakes and toss to combine. Place a slice of garlic on top of each floret (if the garlic touches the pan rather than the broccoli, it may burn). Roast for 12-15 minutes, tossing once lightly during cooking process.

Read Full Post »

shrimp tacos

These tacos were so good, with a great balance of flavors. When we made our monthly trip to the awesome (though faraway) grocery store Wegman’s recently, I bought my standard 2 lb. bag of shrimp. Since I often have some on hand, I am always looking for new, good things to do with the shrimp. While browsing Food and Wine online, I saw a recipe for tacos that featured fried shrimp and a spicy slaw. I knew I wanted to make a version of them, but I made the recipe all my own based on what I had on hand and our own tastes (mainly, that is, the fact that we’re avocado lovers).

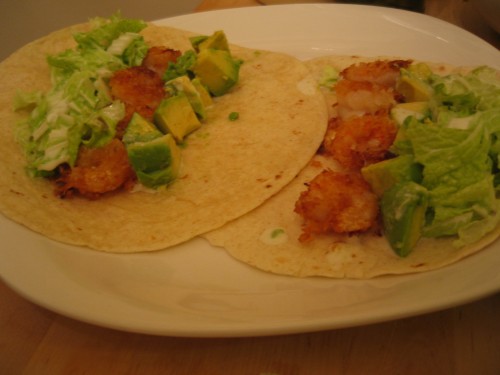
Avocado and crispy shrimp tacos with spicy slaw

Makes 4 tacos (2 servings)

ingredients

for shrimp:

16 shrimp – peeled, deveined, and tails removed, patted very dry

½ cup milk

2-3 Tbsp. plain yogurt

¾ cup panko

Canola oil for frying


for tacos:

1 large, ripe avocado

½ lime

Salt

4 small flour tortillas


for slaw:

1 ½ cups shredded Napa cabbage

¼ cup canola mayonnaise

6 pickled jalapeno slices

1 Tbsp. juice from jar of pickled jalapenos

Up to 1 Tbsp. water as needed

Salt and pepper


directions


1. First, prepare slaw. Finely mince pickled jalapenos until they are almost completely crushed. Place in a medium mixing bowl with the mayo and add the juice from the jalapeno jar and salt and pepper to taste. Whisk together, adding water if needed to make a dressing with a vinaigrette-like consistency. Fold in shredded cabbage and toss to coat cabbage with dressing. Set aside.


2. Next, bread shrimp. Whisk together milk and yogurt in a shallow bowl, adding more yogurt if necessary to make the milk the consistency of buttermilk (so that it just coats shrimp) – the original recipe called for buttermilk, so you can use that if you have some on hand. I made this substitution because the only buttermilk left at the store was in quart-sized containers; that’s definitely not an amount I could use up!


Place the panko in a second shallow bowl. Dip the shrimp first into the milk mixture and then into the panko, pressing to coat shrimp in the crumbs. Set breaded shrimp aside on a clean plate.

3. Roughly dice avocado and toss with juice of ½ lime and a sprinkling of salt on the cutting board.


4. Fry shrimp. Heat about ½ inch of canola oil in a cast iron skillet or another heavy pan over medium-high heat. Oil is ready when a small pinch of flour sizzles and immediately dissipates when added. Fry shrimp for a total of 2 minutes, turning once. Drain shrimp on paper towels.


5. Warm tortillas by wrapping them in a clean kitchen towel and heating in the microwave for 20-30 seconds on high. Plate tacos by dividing shrimp and avocado among the tortillas and topping each with slaw and a drizzle of additional dressing.


Enjoy!

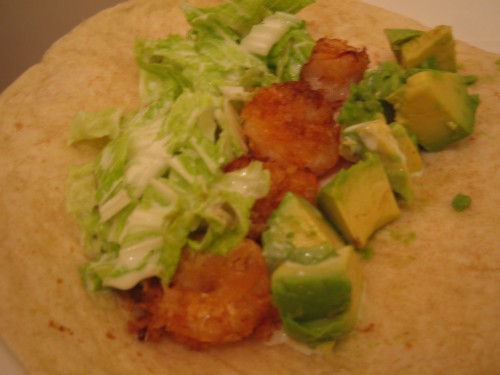
one taco

For the Food and Wine recipe that inspired me to create this dish, click here.

Read Full Post »

Christmas dinner

dinner 2

shrimp salad

scallop-salad

coconut cake

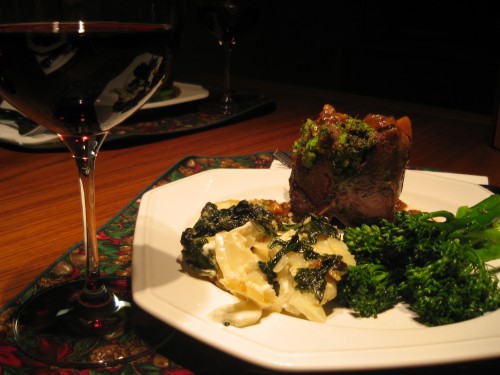
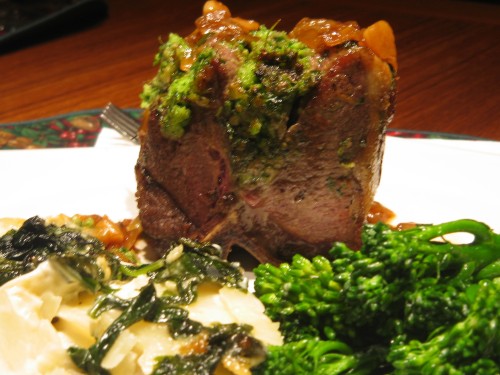
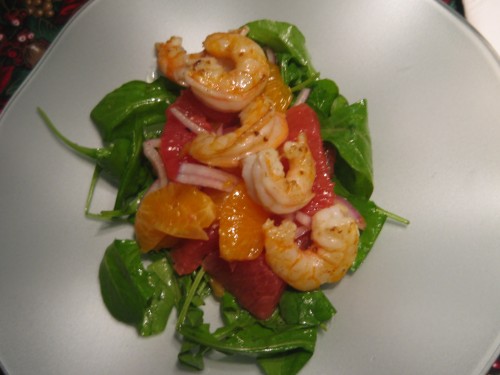
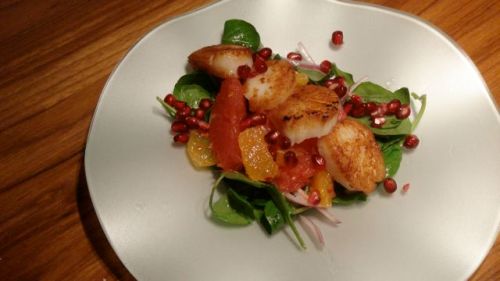
I’ve said it before, and I’m sure I’ll say it again – it is so much fun to have a family that enjoys preparing good food together. This year’s Christmas dinner was definitely awesome. My dad and I set to thinking of a main dish, and we turned to the cookbook he owns from Boulevard, a fantastic restaurant in San Francisco (I haven’t had the opportunity to eat there yet, but the rest of my family did).  We thought that lamb might be good, and so we decided on a Boulevard recipe for porterhouse lamb chops stuffed with broccoli rabe and “melted garlic.” A porterhouse lamb chop is similar to a porterhouse steak in that it includes a loin side and a filet side divided by a t-bone. Whole Foods agreed to cut these for us to the required thickness (2 inches). We decided on a simple veggie of sauteed broccolini, and my mom made au gratin potatoes with spinach as the side dish. She also made delicious arugula and citrus salads for a first course, topped with shrimp for me and scallops for everyone else (the texture of scallops still freaks me out a bit).

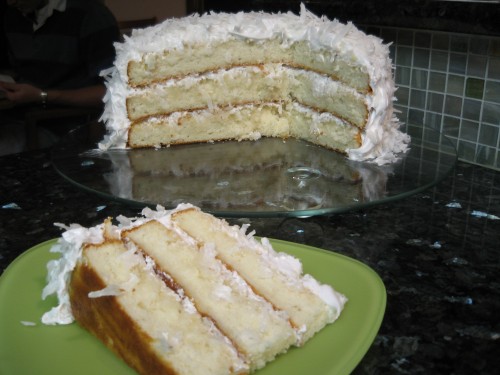
All went smoothly with dinner, but dessert was a different story, although things came out great in the end. My mom had decided she wanted to make an entirely-from-scratch coconut cake with fresh coconut, so the night before our dinner, we spent considerable time busting open the coconuts, shredding a LOT of fresh coconut, and simmering the coconut water with sugar. The next morning, I woke up and came out of my room to find my mom in the hallway cursing :). It turned out that she had made a reading error and had creamed the egg whites with far too little sugar -and she had been working on the cake for a solid hour when it happened. My dad quickly ran to the grocery store to replace the whole milk we were now out of, and I jumped in to help my mom start over and get back to where she had been faster. We got things back working pretty quickly, and in the end, the coconut cake came out very tasty.

Stuffed Porterhouse Lamb Chops (from Boulevard restaurant)

This is not a detailed recipe, but rather a general idea of what we did, which is hopefully sufficient for you to recreate this dish if you wish.

In terms of the lamb chops, they were actually quite easy to make and the presentation is pretty impressive. To make the filling, you blanch and  ice-water-rinse the broccoli rabe stems from one bunch of rabe. Then, you put them in a food processor and blend with the broccoli rabe tops and leaves, 1 tsp. lemon zest, 1/2 cup mascarpone cheese, 1/2 cup panko, salt, pepper, a little fresh parsley, and the “melted garlic,” which is made by microwaving 1/3 cup olive oil with halved garlic cloves until the cloves sizzle. The oil is actually the “melted garlic.” I thought this was a fun, restaurant-y trick for making a quick garlic oil.

To stuff the chops, cut down each side of the t-bone, leaving the top of the T intact. Stuff each side of the bone with about 2 Tbsp. stuffing, and tie the chop with kitchen twine.

Sear chops in an ovenproof skillet over high heat until well-browned on all sides and transfer to a 400 degree oven.  Remove when internal temperature reaches 140 for medium-rare. Tent with foil and let rest 5 minutes before serving.

Meanwhile, make a meat jus by sauteeing a small onion and 5 cloves crushed garlic in 2 Tbsp. olive oil over medium heat. Add 1/2 cup dry white wine, 1 cup dark chicken stock, 3 thyme sprigs, and salt and pepper and raise the heat to medium-high. Cook until reduced by half, and remove thyme springs before pouring over chops to serve.

My dad made the jus while I cooked the chops, and we had a lot of fun with this recipe! A belated happy holidays to all and I look forward to more blogging in 2009.

Read Full Post »

Texas caviar

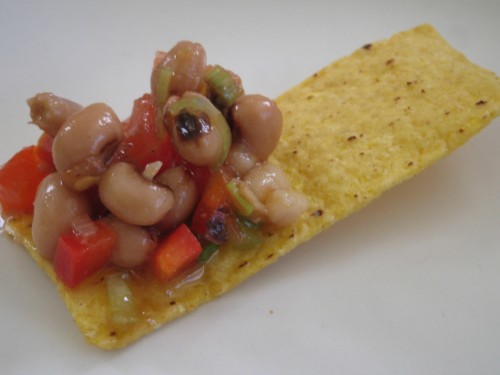
For my second selection for Dinner Divas (see below for my first), I chose this Texas caviar recipe. If you are not familiar with Texas caviar, it is essentially a black-eyed pea salsa. I thought it was very appropriate to make these black-eyed peas during the first week of the new year, since they’re supposed to be eaten on New Year’s Day for luck. This dip is so delicious! We could not stop eating it. I will definitely be making this again as a side or appetizer in the future. I made a few changes from the original, so feel free to check the link if you want to see the recipe that claims to be from the “Cowgirl Hall of Fame.” Note that this recipe is one that definitely needs to sit in the fridge overnight for the flavors to marry. I couldn’t believe how different it tasted when we went to eat it than it had when I made it and tasted to check the seasoning the day before.

Texas caviar

Adapted from: Epicurious

ingredients


1 can black-eyed peas, drained and rinsed

3 jarred roasted red peppers, chopped

4 scallions, thinly sliced, green part only

½ Tbsp. hot sauce (I use Cholula)

½ Tbsp. Worchestershire sauce

Salt and pepper

6 pickled jalapeño chile slices, finely chopped

1 firm, ripe, chopped tomato

Vinaigrette (the original recipe just called for this without specifying, so I whisked together about 2 Tbsp. white wine vinegar, salt, and a generous dash of ground cumin with 3-4 Tbsp. of olive oil)

½ fresh red bell pepper, finely chopped

2 cloves fresh garlic, pressed or minced


directions

Combine all ingredients in a large bowl and fold together with a spatula until well combined. Refrigerate overnight, in a covered container. Serve with saltine crackers or corn tortilla chips.

Read Full Post »

Chicken sausage stew

For December, I was selected to choose the recipes for Dinner Divas. The only problem was, between finals, finishing up work, and being out of town for 11 days, it took me until early Jan. to actually cook the recipes I’d chosen! However, I have made them both now, and I am happy to report that they were both very good (Texas caviar to be posted shortly). The people choosing the recipes each month are supposed to choose one Food Network recipe and one non-FN recipe. For my FN recipe, I chose this stew from Dan and Steve (the original Next Food Network Star winners).

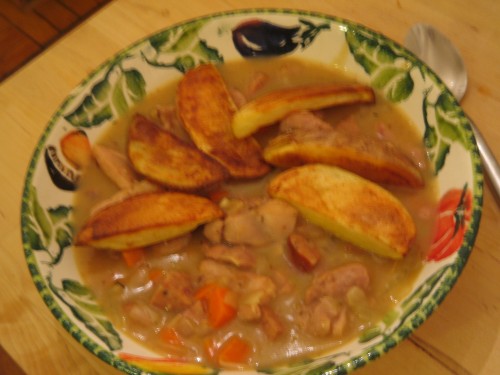
This stew is very smooth and velvety from all the flour. I used only 1/3 the amount of butter the original recipe called for (a ridiculous 10 Tbsp.!) and found it to be plenty rich. The most interesting thing about this stew, however, was the addition of fresh fennel and orange zest. These ingredients gave it a flavor much different from the average stew and also very different from what you’d think it would taste like just looking at it. It was very tasty and we both enjoyed it. Rather than mixing in the oven-roasted potatoes from the recipe as they suggest, I topped it with oven fries, resting them on top to keep them crispy. The potatoes were a great addition, but the stew would also be very good with a scoop of basmati rice. I’ll definitely keep this recipe around.

Dan and Steve’s Chicken and Sausage Stew

Adapted from: The Hearty Boys, Food Network

ingredients

3 tablespoons butter (I reduced this from the original 10!)

2 pounds boneless, skinless chicken thigh meat, cut into 2 -inch chunks (I used 1.65 pounds)

Salt and pepper

8 ounces andouille sausage, diced

1 yellow onion, diced

2 garlic cloves, minced

2 carrots, peeled and diced

1 small fennel bulb, trimmed and sliced

½ Tbsp. dried thyme

5 cups chicken stock

Zest of one orange (I did a lazy job of getting all the zest and it was still plenty orange-y)

1/2 cup all-purpose flour

1/4 cup white wine

Oven roasted potatoes (see below)


directions


1. Melt 2 tablespoons of the butter in a Dutch oven over medium heat. Just before the butter begins to brown, add the chicken. Season with a little salt and pepper and cook until browned on all sides, about 8 minutes. Add the andouille and cook 2 more minutes. Remove the meat to a plate and reserve.

2. Melt the remaining 1 Tbsp. butter in the same pot (do not drain meat juices from pot). Add the onion, garlic, carrot, fennel, and thyme and cook over medium heat until the onion turns translucent, about 10 minutes.

3. As the vegetables cook, pour the chicken stock into a large saucepan. Place over medium heat and bring to a simmer. Reduce heat to low.

4. When the vegetable mixture is ready, add the orange zest to the pot along with the reserved meat and any accumulated juices. Mix well. Sprinkle in the flour in batches and stir to coat the vegetables and meat. Cook 2 minutes. Add the wine and stir.  Add the warm chicken stock to the pot 1 cup at a time, stirring as the stock is added. Once all of the stock has been added, bring the stew to a simmer for 20 minutes. Check seasoning and add more salt or pepper if needed. Ladle into bowls, top with potatoes, and serve.


Oven potato wedges

Preheat oven to 425. Cut one small Yukon gold potato per person into 8 wedges. On a lightly greased baking sheet, toss potatoes with enough olive oil to coat, plus salt, pepper, and garlic powder to taste. Arrange in a single layer. Roast for 30 minutes, flipping wedges over after 20 minutes.

Thanks to Ashlee at “A Year in the Kitchen” for providing the proper potato wedge cooking temperature and time in her blog.

Read Full Post »

cajun chicken pasta

cajun chicken pasta

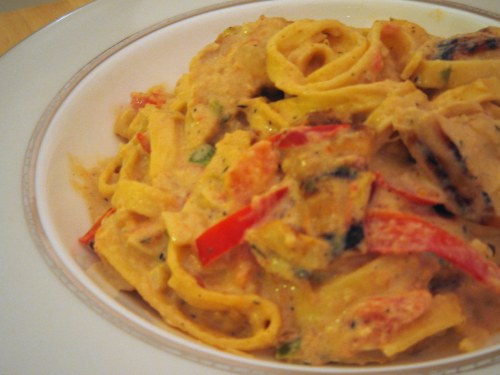
You know a recipe is good when you have to artfully arrange the leftovers in your fine china to take a picture of because you dove into the first servings without waiting, but you still feel it would be a crime not to blog it. That’s this recipe. After ONE BITE, Craig said, “Wow, we need to have this more often.”  I told him that would probably not be in our waistlines’ best interest, but there is no doubt that this recipe will be added to our rotation (ok, so I don’t have a rotation – as I’ve mentioned, I rarely make the same dish twice – but this one will be one of those rare exceptions).  Thanks to Elizabeth of Elizabeth’s Edible Experience for sharing the adaptation of an Emeril recipe.  She made it with the original shrimp, but I made this the week before we were headed out of town for 11 days, so I didn’t want to buy my usual 2-pound bulk bag of shrimp.  I decided to make it with chicken, and Craig said he prefered it that way because he could get meat in every bite in a way you wouldn’t if it were topped with 6 or so shrimp.  Of course, you could always chop the shrimp, which might be a fun variation for next time.  And yes, there will be a next time.  Soon.

Cajun Chicken Pasta

Adapted from: Elizabeth’s Edible Experience, originally from Emeril Lagasse

ingredients

10 oz. package fresh fettuccine

¾ pound chicken breast

1 Tbsp. butter

½ Tbsp. olive oil

1 ½ Tbsp. Emeril’s Essence, plus more for rubbing chicken (follow the link to Elizabeth’s blog to see how to make this spice blend at home)

Salt and pepper

1 cup finely chopped yellow onion

1/4 cup finely chopped jalapeno (I used even less with all the cayenne in the Essence, and it was still pretty spicy.  I used about ½ of a small jalapeno)

1 red bell pepper, thinly sliced (I added this)

1 Tbsp. minced garlic

1 ½ cups heavy cream

1 cup diced fresh tomatoes

½ cup reserved pasta cooking water

1 cup grated Pepper Jack cheese

1/4 cup grated Parmesan


directions

1. Rub the chicken breast with Essence and grill until done.  Let cool and cut into bite-sized pieces.

2. Set a large stock pot of water to boil and add some salt. Place the fettuccine in the pot and stir the pot until the water returns to a boil. Cook the pasta until tender al dente. Drain and reserve 1/2 cup pasta water.

3. While water comes to a boil and the pasta cooks, prepare the sauce. Set a 12-inch sauté pan over medium-high heat. Add the butter and olive oil to the pan. Once the butter has melted, add the onions, bell pepper, and jalapenos to the pan and sauté until the onions are softened and lightly caramelized, about 4 to 5 minutes.  Add the garlic to the pan and sauté until fragrant, about 30 seconds. Add the cream, Essence, and salt and pepper to taste.

4. Bring sauce to a boil and cook until the cream is reduced by half, about 2 minutes.  Add the chicken, tomatoes, fettuccine and the reserved cooking water to the pan and cook, tossing to incorporate for 3 to 5 minutes.

5. Remove pan from the heat and add the cheeses, tossing to blend.  Serve immediately.

Note: this does not reheat as well as I thought it would, so eat up when it’s fresh!

Read Full Post »

gnocchi

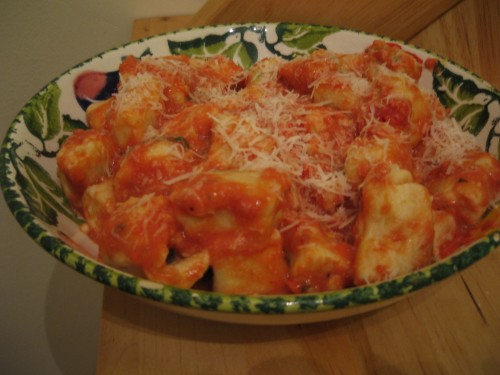
Ok, so I have been meaning to post this recipe for awhile. I made this dish in celebration of six months of marriage, which was on November 17. So yes, I am a slacker for not posting it sooner! The reason I wanted to make this dish for a special occasion (and six months of marriage fell not long after we marked 6 years together, so it was extra-special), is that this is our favorite dish to order at Maggiano’s. We have gone to Maggiano’s on numerous occasions just to order a big plate of their ricotta gnocchi in vodka sauce to share with a salad. When I saw a very similar recipe that I could try at home, I knew I wanted to make it. This came out very tasty. I think it was almost as good as the Maggiano’s version, and it was certainly made with more love! As a bonus, ricotta gnocchi are probably a little easier to make than potato gnocchi. Try it!

Ricotta gnocchi with tomato-cream sauce

Adapted from: Cook’s Illustrated

ingredients

for the gnocchi:

16 oz. whole milk ricotta cheese (must use whole milk ricotta, not part-skim)

2 slices of white bread, crusts cut off and torn into quarters

1 egg

2 Tbsp. minced fresh basil leaves

Salt and pepper

All-purpose flour

½ cup grated parmesan cheese, plus more for serving


for the sauce:

1 Tbsp. extra-virgin olive oil

1 large garlic clove, minced

1 14.5 oz. can low-sodium plain tomato sauce

Salt to taste

1/8 tsp. sugar

2 Tbsp. chopped basil leaves

2-3 Tbsp. heavy cream, at room temperature


directions

To prepare gnocchi:

1. Line a fine mesh strainer with a triple layer of paper towels.  Place ricotta in strainer, cover with a plate, and refrigerate for 1 hour. You can put another plate underneath to catch any dripping liquid, but mine did not have any – the paper towels absorbed it all.

2. Meanwhile, preheat oven to 300 degrees.  Process bread pieces in a food processor until finely ground.  Spread crumbs on a baking sheet and bake until dry and slightly golden, about 10 minutes. Let cool.

3. Place ricotta in food processor and pulse to a fine, grainy consistency, about eight quick pulses. Transfer to a large bowl and fold in egg, basil, salt and pepper with a rubber spatula.  Add 6 Tbsp. of flour, parmesan, and bread crumbs and stir until well combined.  Refrigerate for 15 minutes.

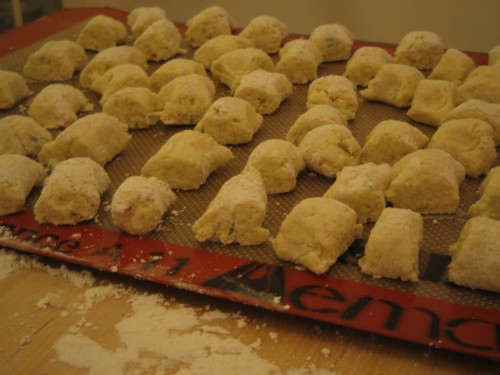
4. Check the texture of the dough.  It should roll into a ball easily, leaving few crumbs on your hands.  Add more flour if necessary to achieve this texture (I didn’t need to do this).  Dust work surface and hands with flour.  Roll a lemon-sized piece of dough into a ¾-inch rope, rolling from the center outward.  Cut rope into ¾-inch long pieces and transfer to a parchment or silicone-lined baking sheet.  Repeat with remaining dough.

5. Bring a large pot of lightly salted water to a boil. Reduce heat to a simmer and cook gnocchi at a simmer in 2 batches.  Once all pieces float to the surface, continue to simmer for 2 minutes before removing with a slotted spoon.  Repeat with second batch.


While water is heating, prepare sauce:

1. Heat oil in a high-sided skillet over medium heat until shimmering.  Add garlic and cook 20 seconds.  Stir in tomatoes, salt, and sugar and simmer 5 to 6 minutes.  Turn off heat and stir in basil and cream.  Check seasoning.

2. Gently fold gnocchi into sauce.  Serve immediately with additional grated parmesan.

Serves 3 as a main course.

dressed gnocchi

Read Full Post »