Feeds:
Posts
Comments

Archive for August, 2009

CPK

There is really nothing better than homemade pizza.  Of course, homemade pizza fulfills a much different role in life than delivery or takeout pizza.  The latter is the ultimate in convenience, while the former…well, it requires a fair bit of planning and timing.  Maybe that’s why not that many people make their own pizza from scratch.  Once you do, though, you will be hooked!

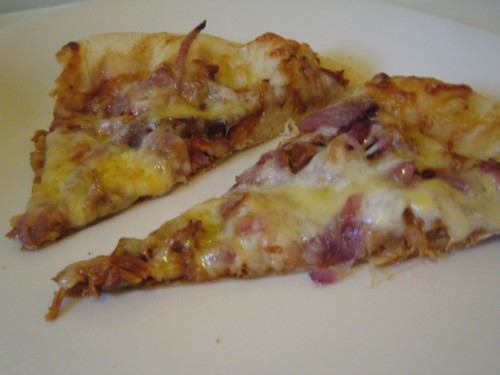
This pizza comes from the California Pizza Kitchen cookbook.  It’s their original recipe that is now imitated by everyone – barbeque chicken pizza – but with a few adaptations that I feel are improvements.  First, I cooked the chicken in the Crock-Pot and shredded it.  I like the shredded barbeque on pizza rather than the more standard grilled or sauteed chunks, because this way you get a little chicken in each bite.  Second, I carmelized the red onions instead of just putting them on the pizza raw.  Perhaps the most useful part of this post, however, is the dough recipe.  This is a great pizza dough.  If you want to make homemade pizza almost as easy a meal as takeout pizza, you can double this dough recipe and freeze half so that you will have dough on hand.

CPK Pizza Dough

Source: The California Pizza Kitchen Cookbook

ingredients

  • 1 tsp. yeast
  • ½ cup plus 1 Tbsp. warm water (105 to 110 degrees)
  • 1.5 cups bread or all-purpose flour
  • 2 tsp. sugar
  • 1 tsp. salt
  • 1 Tbsp. extra virgin olive oil, plus more for coating 

directions 

1. Dissolve the yeast in the water and let stand for 5 to 10 minutes. 

2. Combine the dry ingredients in a large mixing bowl.  Make a well in the middle and pour in the liquids.  Use a wooden spoon to combine the ingredients.  Once the initial mixing is done, lightly oil your hands and begin kneading the dough.  Knead for 5 minutes.  When done, the dough should be barely beyond sticking to your hands.

 3. Lightly oil the dough and the inside of a large glass bowl.  Place the dough in the bowl and seal air-tight (with plastic wrap or the lid).  Set aside at room temperature until the dough has doubled in bulk, 1 ½ to 2 hours. 

4. Punch down the dough, re-form it into a ball, and return it to the bowl.  Cover again and place in the refrigerator for at least several hours, or up to overnight. 

5. Two hours before cooking your pizza, remove the dough from the fridge.  Use a sharp knife to divide the dough into 2 equal portions.  Roll the smaller doughs into round balls, being sure to seal any holes by pinching. 

6. Place the newly formed balls in a glass casserole dish (9 x 13 works well), spaced far enough apart to allow for each to double in size.  Seal air-tight with plastic wrap.  Set aside at room temperature for about 2 hours.  At this time, the dough should be smooth and puffy. 

7. To form dough for pizza, sprinkle flour over a clean surface.  Remove a dough ball from the glass dish, being careful to preserve its round shape (a large spatula may help) and place it on the floured surface.  Flour the dough liberally.  Use your hands to press the dough down, forming a flat circle about ½ inch thick.  Pinch the edge to form a lip around the edge that rises ¼ inch above the center surface.  Continue stretching until the dough reaches about 9 inches in diameter.

For Barbeque Chicken Pizza

Inspired by California Pizza Kitchen

ingredients

  • Cornmeal for handling
  • 1/2 cup barbeque sauce, plus more for coating chicken
  • 1.5 cups shredded mozzarella cheese
  • 1/2 cup shredded smoked Gouda
  • 1 small red onion, thinly sliced
  • 2 large boneless, skinless chicken breasts
  • If making shredded barbeque chicken, 1 Tbsp. apple cider vinegar

directions

1. Cook the chicken as desired.  For shredded chicken, coat generously with barbeque sauce, place in Crock-Pot, and add a tablespoon of apple cider vinegar.  Cook on low for 6 hours, then shred with 2 forks, adding a little more sauce if desired.  For cubed chicken, grill or saute, then coat with barbeque sauce.

2. Place a pizza stone in the (cold) oven and set the oven to 500.  Let the stone preheat for at least 30 minutes and up to 1 hour before using.  Meanwhile, caramelize the onion in a small saute pan over medium-low heat.

3. Sprinkle a layer of cornmeal on a pizza peel and carefully move a dough round to the peel.  Spread 1/4 cup barbeque sauce over the dough.  Top the sauce with 1/2 of the onions, followed by an even layer of chicken.  Sprinkle with half of the mozzarella and half of the gouda. 

4. Transfer the pizza to the stone and bake until the crust is golden and the cheese is bubbly, 8 to 10 minutes.  Remove the pizza to a wooden cutting board and let cool several minutes before slicing.  Devour, then repeat the process with the second pizza.
Read Full Post »

Frito

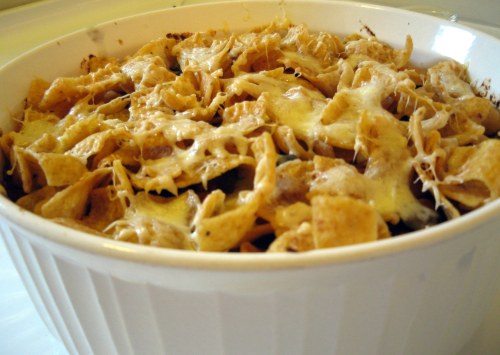
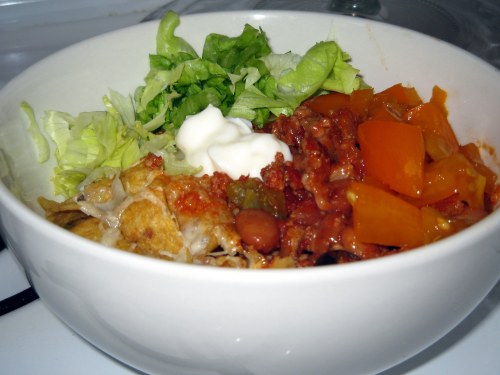
This dish is one of those family classics that is very simple, but has stuck around for a reason.  Craig grew up on this dish, and when we moved out of the dorms in college and started making dinner for ourselves, it was one of the first recipes he requested from his mom.  At first, I was a little skeptical – Craig calls this “Frito pie,” which sounded odd to me.  After the first time he made it, though, I was completely won over.  What’s not to like about a crispy, cheesy Frito topping?  Of course, we had to make this recipe our own over time and put our own spin on it.  We have probably made this dish every couple of months or so for the past five years, and we now have it perfected to the way we like it. 

Last year, sadly, Craig’s mom passed away.  A couple of months later, wanting to assemble her best recipes and hold on to them, his dad and his sister were on the hunt for this recipe.  It seems the original copy had somehow disappeared from his parents’ house.  Well, I was so happy to be able to tell them that I still had the copy she had made for us during college, and I quickly sent it back their way.  This is a recipe that will certainly live on in our household, and we are looking forward to getting our own kids hooked on it someday as a family classic handed down from their grandmother.

Frito Pie

Our adaptations to Sally’s recipe

ingredients

  • 1 lb. ground meat (the original, of course, is ground beef, but I almost always use ground turkey or chicken)
  • 1 cup finely diced onion
  • 2 Tbsp. chili seasoning (I make my own using chili powder, cumin, oregano, garlic powder, cayenne, salt, and pepper)
  • 6 oz. can tomato paste
  • ¾ cup water
  • 6 oz. Fritos (as an interesting aside, I think that when this recipe was written, that was the standard size for a bag of Fritos. Now, needless to say, bag size has expanded and you will have Fritos leftover.)
  • 1 can beans (I usually use black beans, but the original calls for kidney beans. Pinto beans are also really good in this dish.)
  • 1 small can sliced black olives
  • 2 cups shredded cheese (cheddar or a Mexican blend)
  • Toppings of your choice, such as: sour cream, diced avocado or guacamole, shredded lettuce, diced fresh tomato, pico de gallo (the toppings were another modification that Craig and I made to the original, and I think they make it much more interesting.)

directions

1. Preheat the oven to 350 degrees. Brown the meat in a large sauté pan or cast iron skillet over medium-high heat.  Add the onion, chili seasoning, tomato paste, and water.  Reduce the heat to medium and simmer uncovered for 5-10 minutes, until mixture has thickened and water has evaporated, stirring occasionally.

2. Spray a round, high-sided casserole with cooking spray. Layer ingredients as follows: ½ of the Fritos, ½ of the meat mixture, ½ of the beans, ½ of the olives, and ½ of the cheese.

3. For the second layer, add ingredients as follows: remaining meat mixture, remaining beans, remaining olives, remaining Fritos, remaining cheese.

4. Bake at 350, covered, for 30 minutes.  Remove the cover and bake for an additional 10-15 minutes, until cheese and chips start to brown on top.  Let cool 5 minutes before serving with toppings as desired.

Yum – check out that crispy, Frito-y crust…

Frito done

Read Full Post »

chipsters

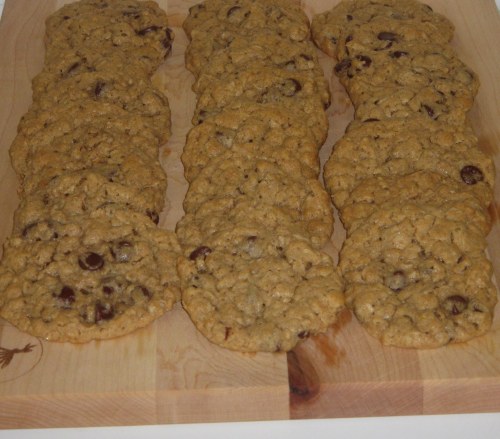
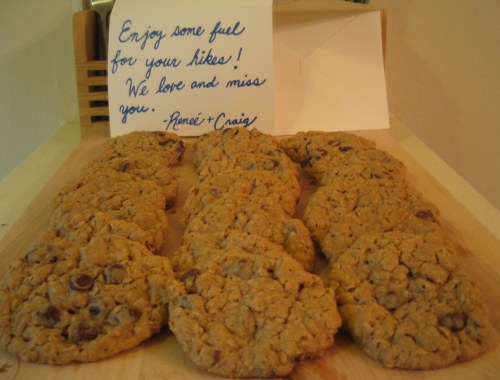
You may or may not remember my brother from my Kung Pao shrimp post about a year ago. Well, in the past year, my brother graduated from college and moved to Alaska for a position with the Alaska Army National Guard. For the summer, though, he is working in a resort kitchen – skills that will no doubt come in handy when he gets his own apartment next month. I wanted to send him some love, so I made these cookies to ship up to him. Since I knew they would take about 4 days to get there even with expedited mail, I needed a cookie that could stand up to several days in transit. One of my internet friends suggested this recipe, and these cookies came out great. They had lovely flavor from the fresh nutmeg and cinnamon, and the peanut butter was not too overwhelming. I will definitely be making these again in the future. Oh, and by the way, they apparently stood up to the shipping fairly well and were enjoyed thoroughly – see the bottom picture below!

Chocolate chip – peanut butter chipsters

Source: Dorie Greenspan via Proceed with Caution

ingredients

3 cups old fashioned oats
1 cup all purpose flour
1 tsp baking soda
2 tsp ground cinnamon
1/4 tsp freshly ground nutmeg
1/4 tsp salt
2 sticks (8 ounces) unsalted butter, at room temperature
1 cup peanut butter–chunky or smooth (but not natural) (I used smooth)
1 cup sugar
1 cup (packed) light brown sugar
2 large eggs
1 tsp pure vanilla extract
9 ounces bittersweet chocolate, chopped into chunks, or 1 1/2 cups store-bought chocolate chips or chunks (I used Ghirardelli semisweet chips)

directions

Getting Ready:
Position the racks to divide the oven into thirds and preheat the oven to 350 degrees F. Line two baking sheets with parchment or silicone mats. (My oven is very small – I had to bake one batch at a time).

Whisk together the oats, flour, baking soda, spices and salt.

Working with a stand mixer, preferably fitted with a paddle attachment, or with a hand mixer in a large bowl, beat the butter, peanut butter, sugar and brown sugar on medium speed until smooth and creamy. Add the eggs one at a time, beating for 1 minute after each addition, then beat in the vanilla. Reduce the mixer speed to low and slowly add the dry ingredients, beating only until blended. Mix in the chips. If you have the time, cover and chill the dough for about 2 hours or for up to one day. (Chilling the dough will give you more evenly shaped cookies.) (I chilled it for about 4 hours).

If the dough is not chilled, drop rounded tablespoonfuls 2 inches apart onto the baking sheets. If the dough is chilled, scoop up rounded tablespoons, roll the balls between your palms and place them 2 inches apart on the sheets. Press the chilled balls gently with the heel of your hand until they are about 1/2 inch thick.

Bake for 13 to 15 minutes, rotating the sheets from top to bottom and front to back after 7 minutes.(I definitely found that they were on the longer side of this baking time, even wanting them barely done so that they would stay soft during shipping). The cookies should be golden and just firm around the edges. Lift the cookies onto cooling racks (or my classic – brown paper bags) with a wide metal spatula – they’ll firm as they cool.

Repeat with the remaining dough, cooling the baking sheets between batches.

with note

My parents happened to be visiting my brother when the cookies arrived, so my dad took this picture of my brother and my mom opening them. As you can see, I packed wrapped each layer in foil and put them in Gladware. I also put a layer of plastic wrap between each layer.

cookies arrive

Read Full Post »